
Reviving old furniture into vintage masterpieces is not only a rewarding hobby, but also a sustainable way to decorate your space with character. With the right tools, techniques, and a little patience, you can transform forgotten or worn-out pieces into stunning accents that tell a story. This guide walks you through the process from understanding vintage styles to finishing and restoring a piece with care.
Understanding Vintage Furniture Styles and Their Characteristics
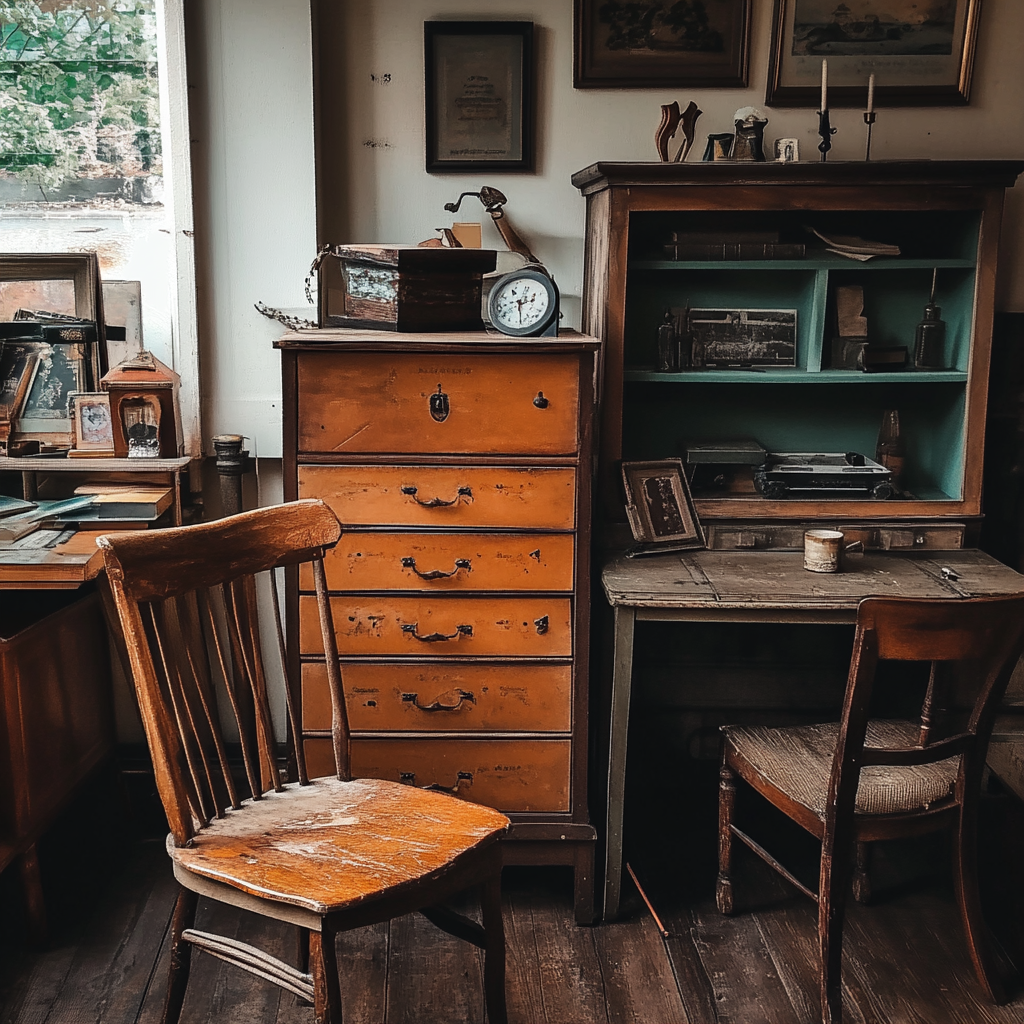
Before starting any project, it’s essential to grasp the distinct styles that define vintage furniture. From mid-century modern to shabby chic, each era offers unique elements. For instance, art deco boasts sleek lines and metallic accents, while farmhouse vintage highlights raw wood and utilitarian charm. Recognizing these styles allows you to approach your transformation with an informed and inspired vision.
Vintage furniture often carries patina—the natural wear that gives it soul and uniqueness. This includes faded paint, weathered wood, and ornate details such as claw feet, spindle legs, or antique drawer pulls. Rather than hiding these marks of time, many enthusiasts embrace them as part of the charm that sets true vintage pieces apart from reproductions.
To guide your inspiration, browse old catalogues, antique markets, or online archives. Take note of what appeals to you—whether it’s the simplicity of Scandinavian design or the bold flair of retro American furniture. Understanding these characteristics will help you decide what to preserve, enhance, or replicate in your own project.
Choosing the Right Furniture Piece for Your Project
The foundation of any successful vintage transformation lies in choosing the right piece to begin with. Ideally, look for solid wood construction—materials like oak, walnut, or mahogany offer durability and finish beautifully. Avoid mass-produced, pressboard items, which may not respond well to stripping or refinishing.
You don’t need to spend a fortune to find potential gems. Thrift shops, flea markets, estate sales, or even roadside pickups can reveal treasures if you know what to look for. Focus on structure over appearance. A scratched surface is easy to fix, but broken legs or water-damaged panels may require advanced repair skills.
Also consider where and how the piece will be used. A small side table might be ideal for a first-time project, while a large armoire could be more challenging. Choose something manageable in size and complexity, especially if you’re new to furniture restoration. By picking a piece with both potential and practicality, you’re setting yourself up for a fulfilling creative experience.
Preparing Materials and Tools for Crafting Vintage Furniture
Once you’ve selected your project piece, gather all the necessary tools to streamline your work. At a minimum, you’ll need screwdrivers, sandpaper in various grits, wood glue, clamps, a putty knife, paintbrushes, and a good-quality paint or stain. Depending on the condition of the furniture, consider adding items like a chemical stripper, a heat gun, wood filler, and protective gear.
Create a clean, well-lit workspace with ventilation, especially if you’ll be working with paint or stripper chemicals. A garage, covered patio, or workshop area is ideal. Lay down drop cloths to protect floors and keep your tools organized and within reach. Preparing your environment properly will save you time and prevent unnecessary mistakes during the process.
Also, decide early on what kind of finish or style you want. Chalk paint, milk paint, antique waxes, and glaze finishes are popular for achieving an aged look. Select your hardware in advance as well—vintage-style knobs and hinges are often the final touch that completes the transformation. With everything ready, you’ll be free to focus entirely on the creative process.
Step 1: Cleaning and Stripping Old Finishes
The first practical step is to thoroughly clean the furniture. Years of dust, wax, and grime can interfere with sanding and paint application. Use warm water and gentle soap or a vinegar-based cleaner, scrubbing with a sponge or cloth. Avoid soaking the wood, as excess moisture can warp older pieces.
After cleaning, evaluate the old finish. If there’s paint or varnish, you may need a chemical stripper or a heat gun to remove it. Apply the stripper in sections, letting it sit for the recommended time, and then scrape it off gently using a plastic or wood tool. Be sure to wear gloves and work in a ventilated area to protect your health during this stage.
Once the bulk of the old finish is gone, sand the surface starting with a coarse grit and gradually moving to a finer one. This step smooths imperfections and prepares the wood for new paint or stain. Don’t rush the prep—a clean and even surface will make all the difference when it’s time to apply your chosen finish.
Step 2: Repairing and Restoring the Furniture Structure
Now that your piece is clean and stripped, it’s time to assess its structure. Look for loose joints, cracks, missing screws, or weak areas. Re-glue wobbly parts using strong wood adhesive and secure them with clamps until fully dried. Pay close attention to areas that bear weight, such as chair legs or drawer bottoms.
If the wood has holes, chips, or deep scratches, apply a high-quality wood filler and allow it to cure before sanding. For damaged trim or missing details, consider replacing sections with pre-carved moldings from craft stores or salvaging parts from other old furniture. The goal is to restore stability while preserving the vintage character.
Ensure all moving parts work smoothly—drawers should glide, hinges should close properly, and any locks should function if still present. This is also the time to test-fit your chosen hardware or make adjustments for aesthetic balance. Only after completing repairs should you move on to decorative painting or staining.
Checklist: Final Touches for a Beautiful Vintage Piece
- Remove dirt and strip old finish carefully
- Sand surfaces gradually, from coarse to fine
- Repair joints, cracks, and missing elements
- Choose historically inspired paints or glazes
- Use vintage-style knobs and handles
- Apply protective finish such as wax or polyurethane
- Add personalized elements like stencils or distressing
Also, check out creative DIY projects using recycled materials for stylish interiors.
FAQ
Can I use modern paint on vintage furniture?
Yes, but using chalk or milk paint offers a more authentic vintage look.
What if I don’t have access to old furniture?
You can recreate vintage charm using new pieces and applying aging techniques.
How long does a full project usually take?
On average, 2–3 days depending on drying time, repairs, and complexity.